
Creating a New Kibana Dashboard
In this blog, we will touch on creating a new Kibana dashboard and deploying it. Our prior Kibana dashboard blogs focused on delivered dashboards that were already deployed.
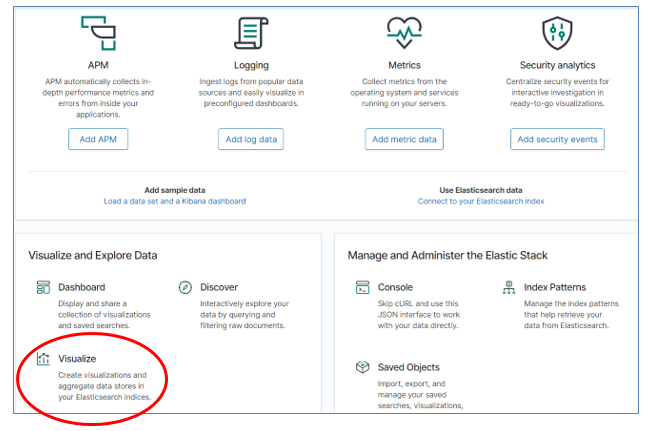
Once logged into Kibana, the first step is to create the visualization.
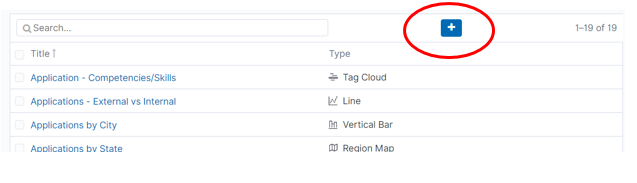
Here we can see the visualizations that are already created. To create a new one, click on the + icon.
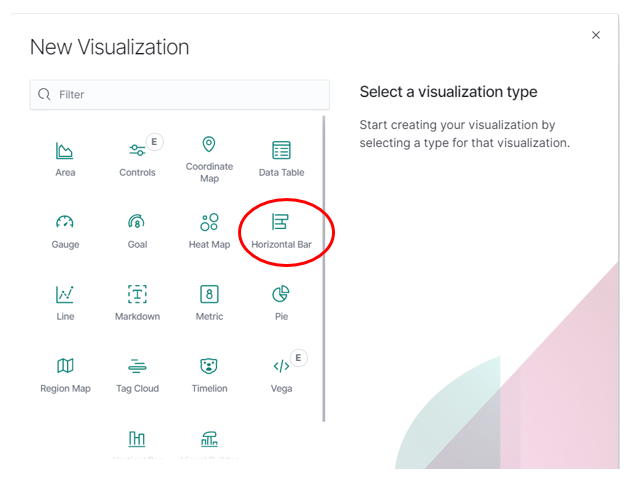
Now, choose the type of graph. In this example, we will choose Horizontal Bar graph.
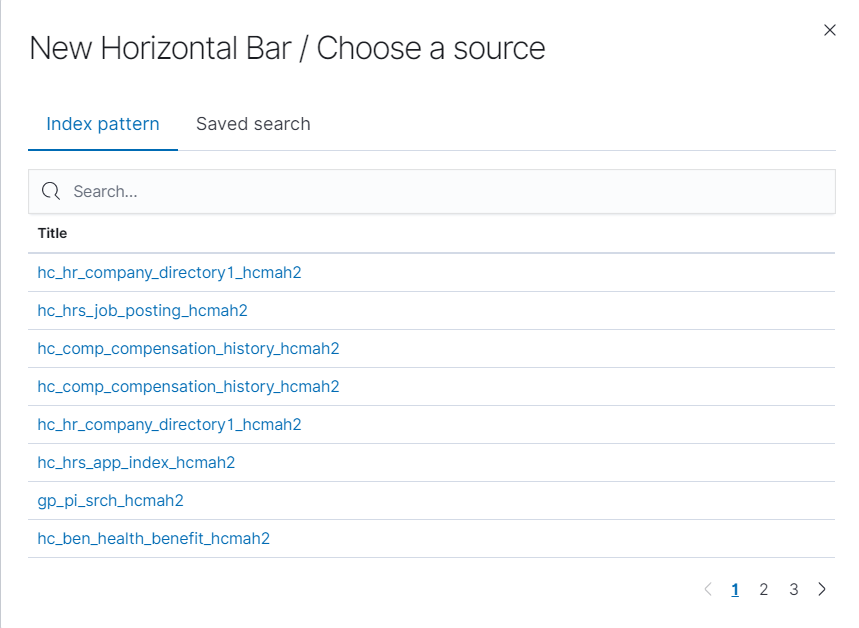
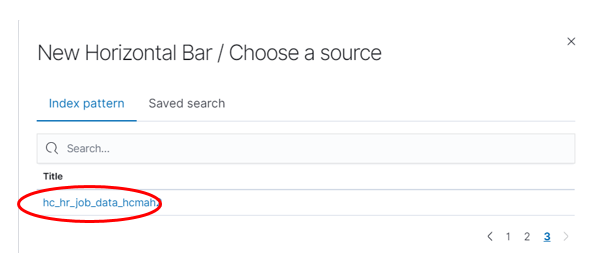
Next, we have to choose the source or the index pattern available. Please note that this blog only covers delivered index patterns.
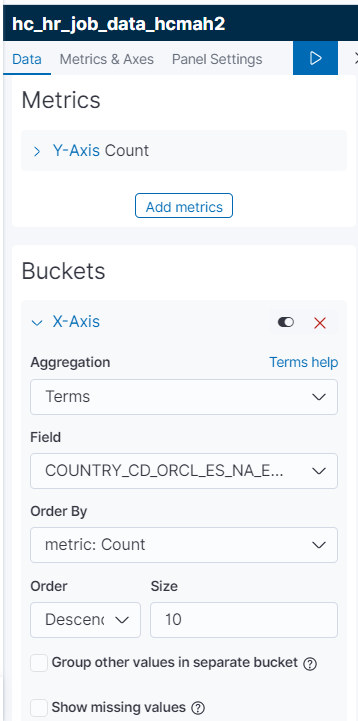
At this point, define the metrics. Our Y-axis is our count. We must choose the X-axis.

Under Aggregation, we will choose the terms or the field values we want to show. We can also choose ascending or descending as well as the size. Generally, 10 works as a good size, but it is something you can adjust.
Once those decisions are made, click on the blue triangle to show the results.

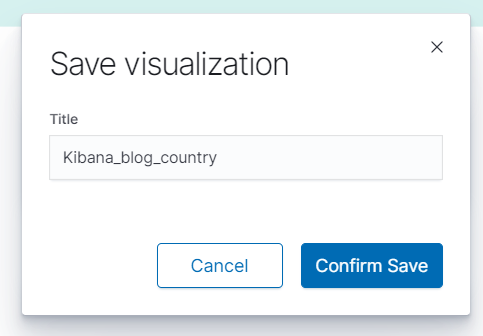
If the chart is what you want to see, you can save the visualization and select an appropriate name.
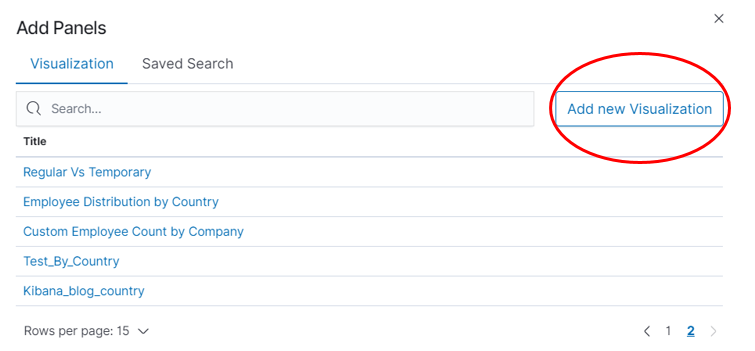
At this point, we must add a visualization to create a dashboard since dashboards are made up of multiple visualizations.
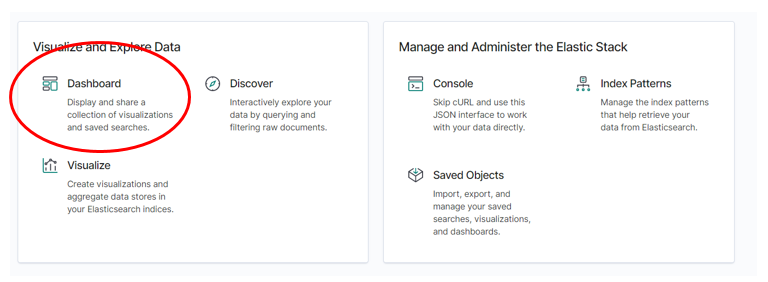
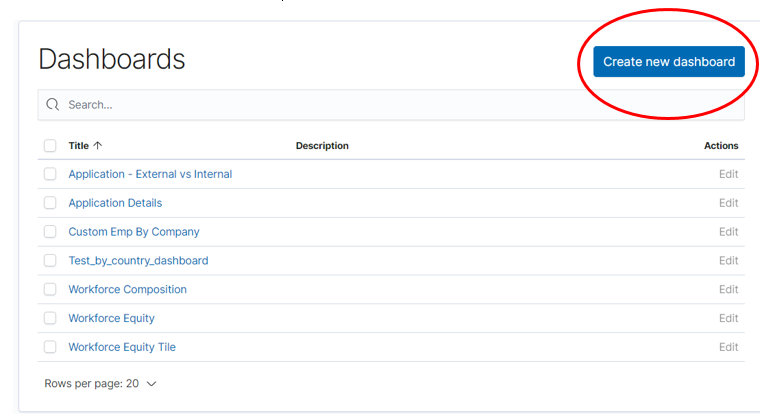
We need to create a new dashboard.
Find the visualization that we just created and add it.
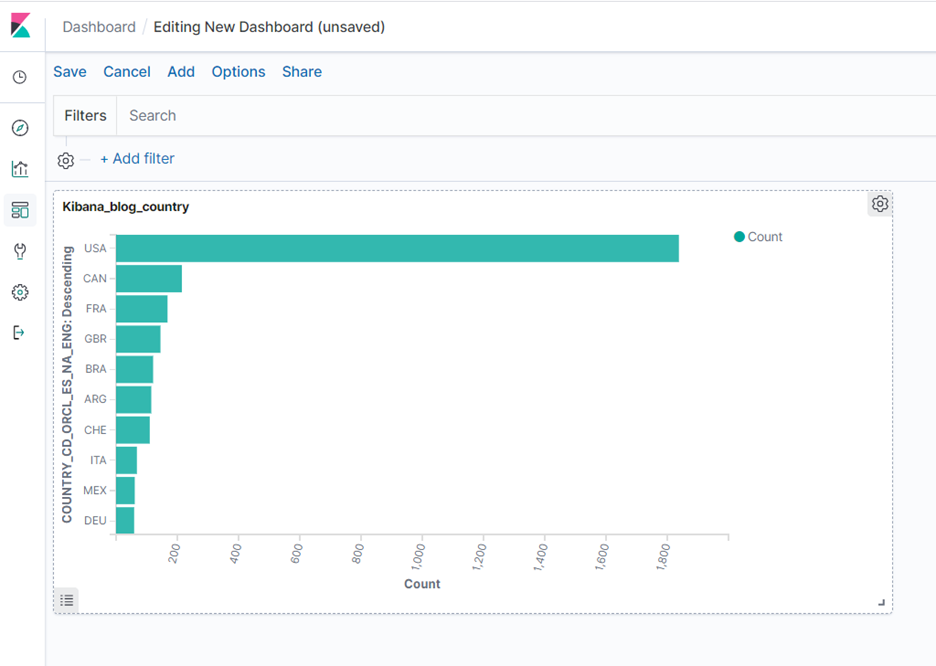
The visualization will appear in the dashboard.
Now, we must name and save the dashboard.

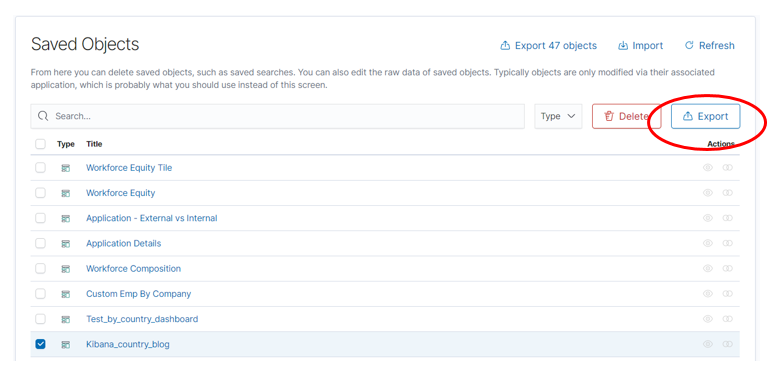
Once saved, export the dashboard. This will make it available in the PeopleSoft HCM environment.
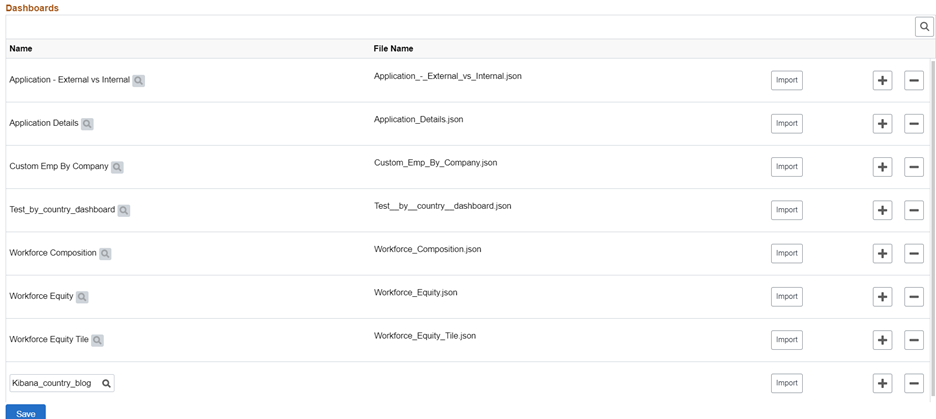
Once exported, we have a few steps within PeopleSoft HCM starting with importing the Kibana dashboard.
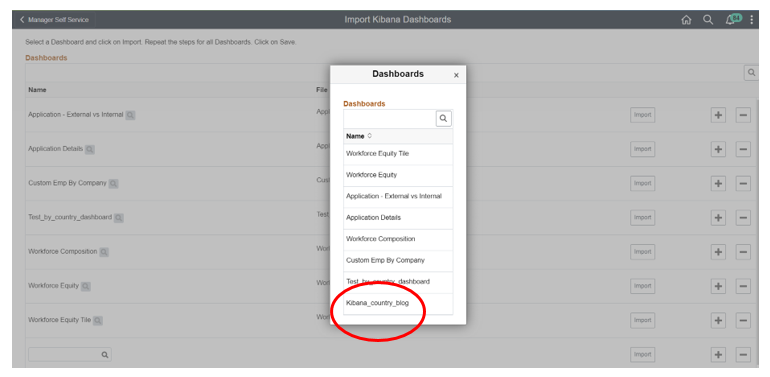
Add the row with the dashboard name we created. Then import and save.
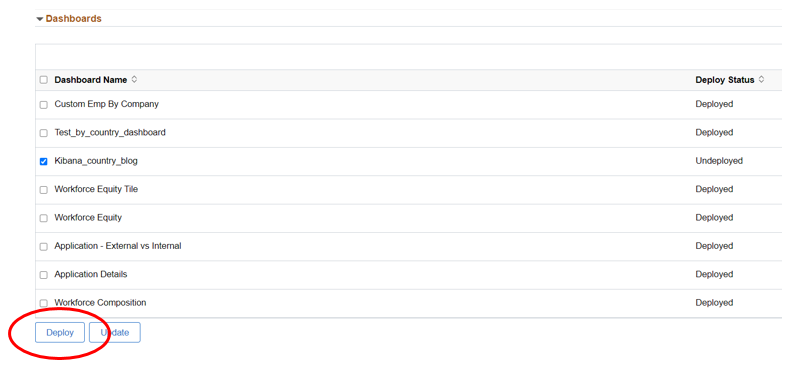
Once imported, deploy the dashboard in PeopleSoft HCM. We select the dashboard name and deploy.
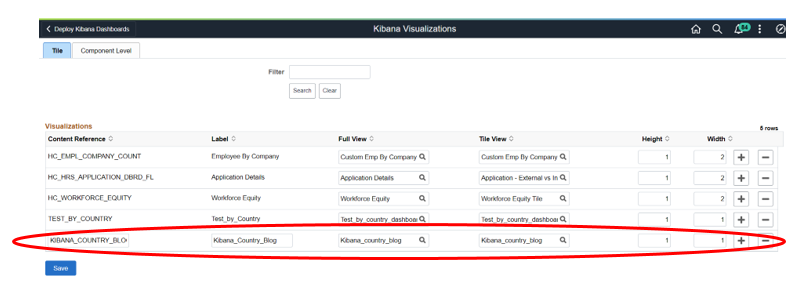
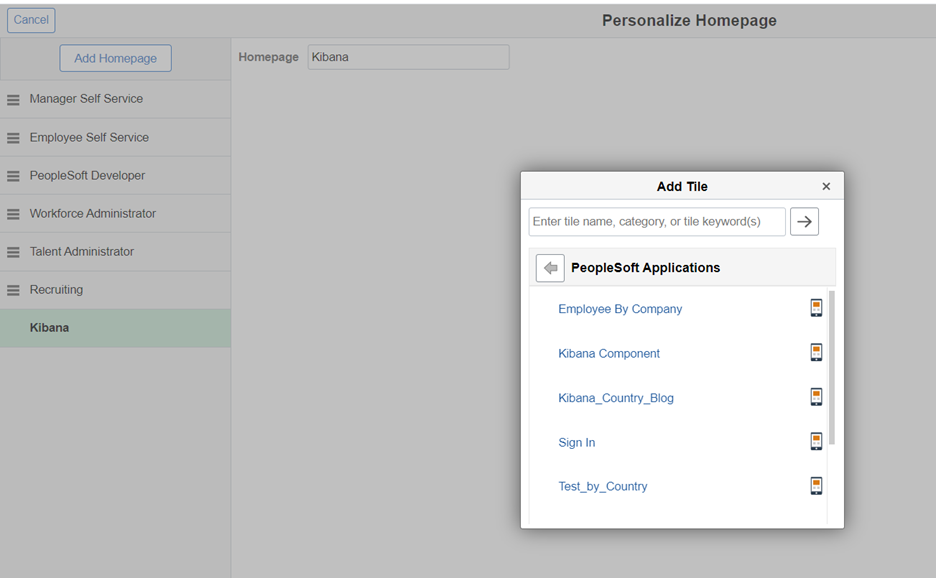
Now that the dashboard is deployed, we want to make it available as a homepage tile. This will allow users to access it from PeopleSoft and visualize it in Kibana.
Add a row, select the dashboard name under Full and Tile Views, provide the name for the Content Reference, label and save.
It is now available as a tile.
The tile becomes available on the homepage.
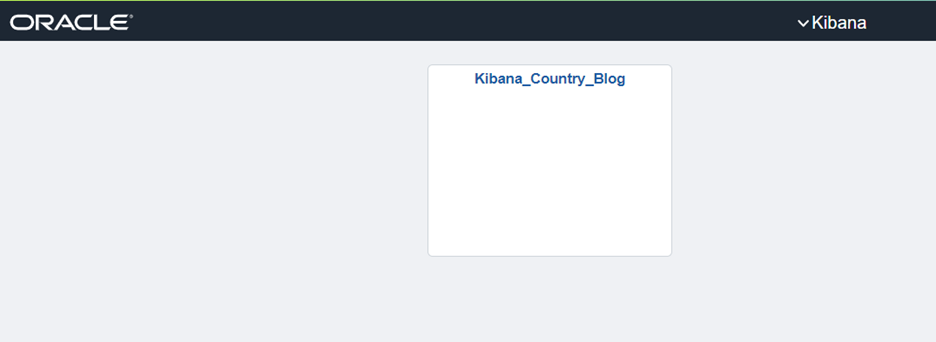
By clicking on the tile, the user can open the visualization in Kibana.

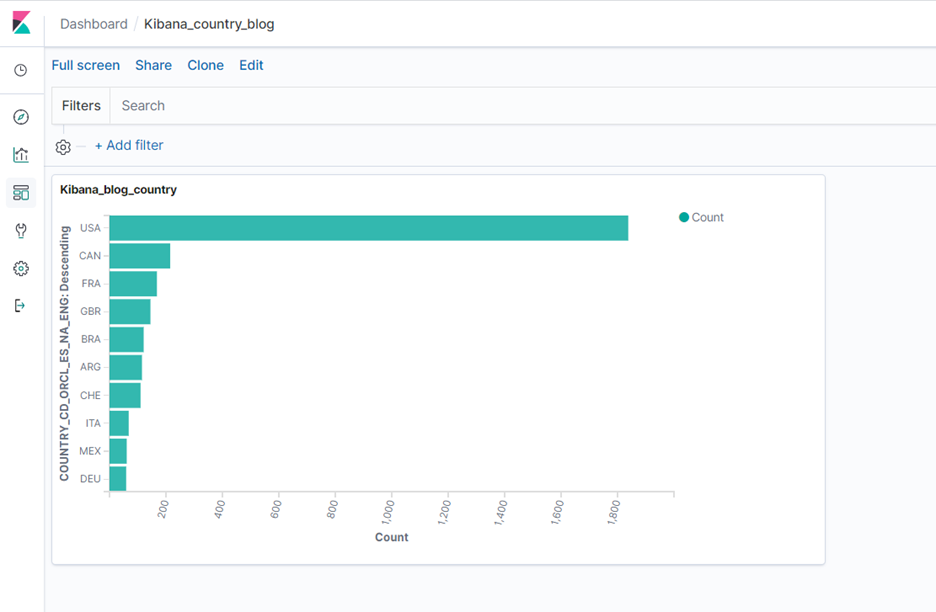
The dashboard renders.
In summary, these are the basic steps in creating a new Kibana dashboard and visualization using delivered indexes.
If you would like more information on this topic, please reach out to me at larry.zagata@miproconsulting.com.
