- November 8, 2016
- Larry Zagata
- Blog
If you have been following our blog in the past few weeks, you may have noticed a pattern. We have been talking about and expanding on the ideas of the FLUID Navigation tools available as of Image 20. (Click here if you missed our last blog.)
In addition to the FSCM Navigation Collections that are pre-built, you can also add additional Navigation Collections to your FLUID Tiles.
In order to enable a specific Navigation Collection, you need to make the Tile available. But the process is easy, just follow these 10 simple steps.
Step 1: Using the NavBar, navigate to >PeopleTools>Portal>Tile Wizard.
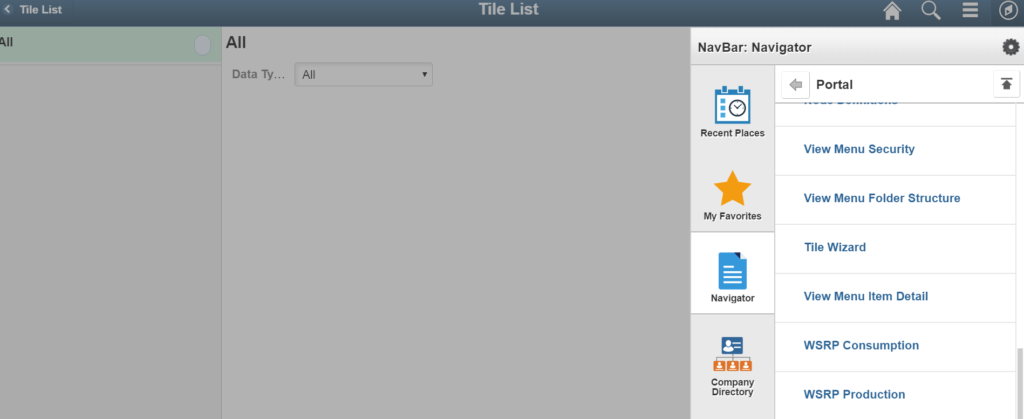
Step 2: Click on the CREATE NEW TILE button.

Step 3: Fill out the basic information of the title of the Navigation Collection.

Step 4: Choose the data type. In this case it is Navigation Collection.

Step 5: Choose the appropriate available Navigation Collection name.
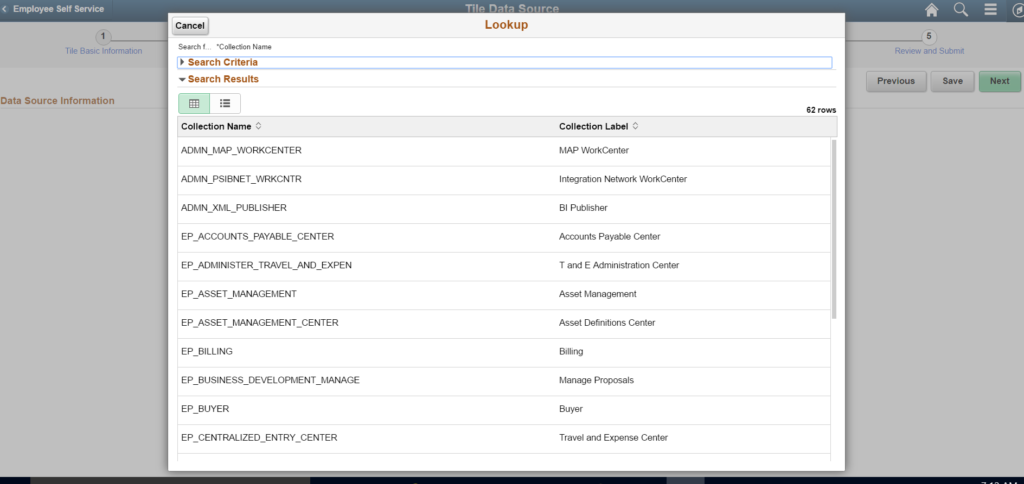
Step 6: Choose a few additional options of the Navigation collection type and whether the panel is collapsible.

Step 7: Choose the owner ID, parent and whether to make the Tile public.

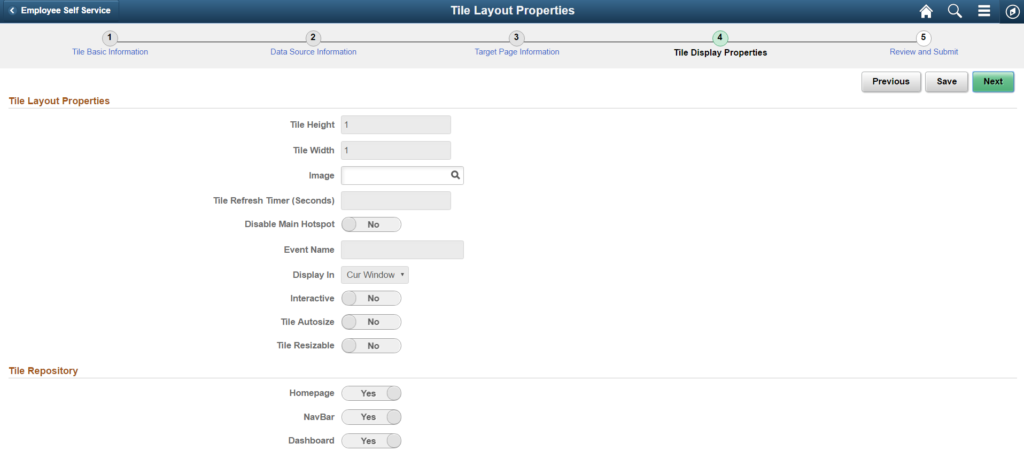
Step 8: Choose a specific image, Tile size, and other options such as where the Tile can be placed (homepage, navbar and dashboard).
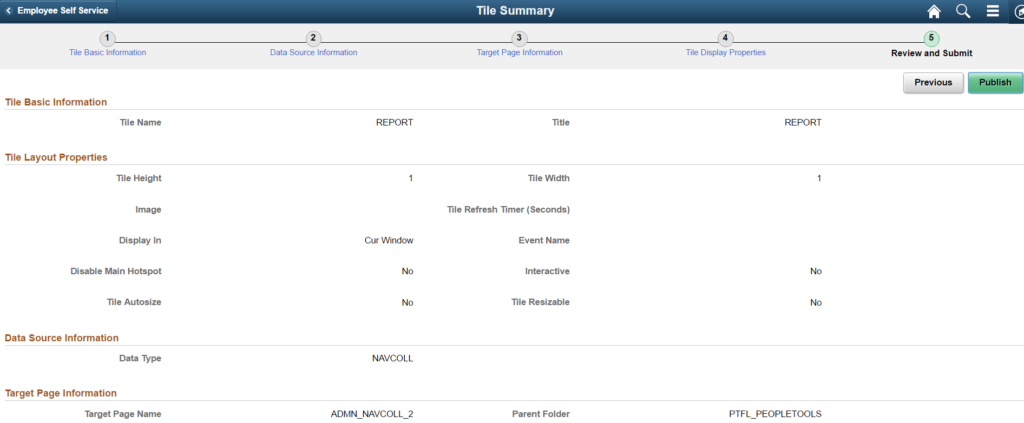
Step 9: Review and hit the publish button.
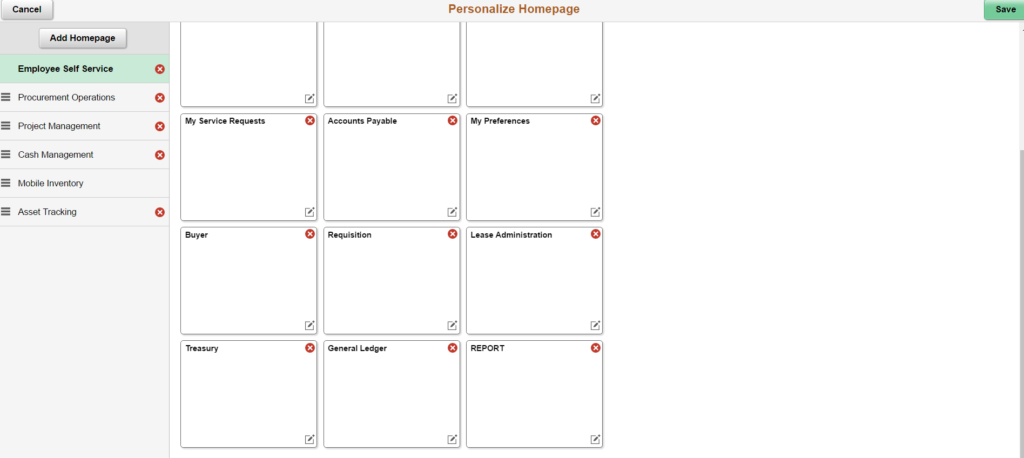
Step 10: Add the Tile to the appropriate FLUID Homepage as previously defined.
The newly created FLUID navigation collection Tile is present.
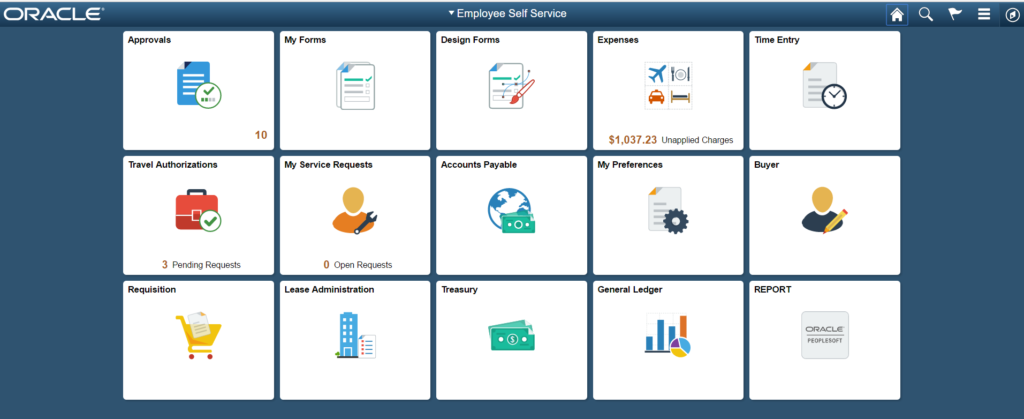
By clicking on the Tile, you can see the BI Publisher content available in FLUID.

If you would like more information on FLUID or FLUID NavBar or any of the FSCM Navigation collections, please email me at larry.zagata@miproconsulting.com.
- Larry Zagata
- Larry Zagata
- Larry Zagata
- Larry Zagata
- Larry Zagata
- Larry Zagata
- Larry Zagata
- Larry Zagata
- Larry Zagata
- Larry Zagata
- Larry Zagata
- Larry Zagata
- Larry Zagata
- Larry Zagata
- Larry Zagata
- Larry Zagata
- Larry Zagata
- Larry Zagata
- Larry Zagata
- Larry Zagata
- Larry Zagata
- Larry Zagata
- Larry Zagata
- Larry Zagata
- Larry Zagata
- Larry Zagata
- Larry Zagata
- Larry Zagata
- Larry Zagata
- Larry Zagata
- Larry Zagata
- Larry Zagata
- Larry Zagata
- Larry Zagata
- Larry Zagata
- Larry Zagata
- Larry Zagata
- Larry Zagata
- Larry Zagata
- Larry Zagata
- Larry Zagata
- Larry Zagata
- Larry Zagata
- Larry Zagata
- Larry Zagata
- Larry Zagata
- Larry Zagata
- Larry Zagata
- Larry Zagata
- Larry Zagata
- Larry Zagata
- Larry Zagata
- Larry Zagata
- Larry Zagata
- Larry Zagata
- Larry Zagata
- Larry Zagata
- Larry Zagata
- Larry Zagata
- Larry Zagata
- Larry Zagata
- Larry Zagata
- Larry Zagata
- Larry Zagata
- Larry Zagata
- Larry Zagata
- Larry Zagata
- Larry Zagata
- Larry Zagata
- Larry Zagata
- Larry Zagata
- Larry Zagata
- Larry Zagata
- Larry Zagata
- Larry Zagata
- Larry Zagata
- Larry Zagata
- Larry Zagata
- Larry Zagata
- Larry Zagata
- Larry Zagata
- Larry Zagata
- Larry Zagata
- Larry Zagata
- Larry Zagata
- Larry Zagata
- Larry Zagata
- Larry Zagata
- Larry Zagata
- Larry Zagata
- Larry Zagata
- Larry Zagata
- Larry Zagata
- Larry Zagata
- Larry Zagata
- Larry Zagata
- Larry Zagata
- Larry Zagata
- Larry Zagata
- Larry Zagata
- Larry Zagata
- Larry Zagata
- Larry Zagata
- Larry Zagata
- Larry Zagata
- Larry Zagata
- Larry Zagata
- Larry Zagata
- Larry Zagata
- Larry Zagata
- Larry Zagata
- Larry Zagata
- Larry Zagata
- Larry Zagata
- Larry Zagata
- Larry Zagata
- Larry Zagata
- Larry Zagata
- Larry Zagata
- Larry Zagata
- Larry Zagata
- Larry Zagata
- Larry Zagata
- Larry Zagata
- Larry Zagata
- Larry Zagata
- Larry Zagata
- Larry Zagata
- Larry Zagata
- Larry Zagata
- Larry Zagata
- Larry Zagata
- Larry Zagata
- Larry Zagata
- Larry Zagata
- Larry Zagata
- Larry Zagata
- Larry Zagata
- Larry Zagata
- Larry Zagata
- Larry Zagata
- Larry Zagata
- Larry Zagata
- Larry Zagata
- Larry Zagata
- Larry Zagata
- Larry Zagata
- Larry Zagata
- Larry Zagata
- Larry Zagata
- Larry Zagata
- Larry Zagata
- Larry Zagata
- Larry Zagata
- Larry Zagata
- Larry Zagata
- Larry Zagata
- Larry Zagata
- Larry Zagata
- Larry Zagata
- Larry Zagata
- Larry Zagata
- Larry Zagata


