- January 25, 2017
- Larry Zagata
- Blog
Today we are going to describe how to create your own configurable Navigation Collections. This is a follow up blog to a previously written blog about the entire list of FSCM Navigation Collections available in FLUID and how to make them available not only on the FLUID Homepage, but also in the FLUID Navigator. If you missed the previous blog you can click this link to read it today.
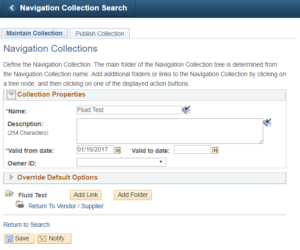
First, you must create a Navigation Collection in classic mode. We have discussed creating classic Navigation Collections in previous blogs and video blogs so I won’t go into the details here. But creating that classic Navigation Collection is step 1. In this case, we will name it Fluid Test.

Once you have the Navigation Collection saved, we now must enable it for Fluid. That first step is to go to the Tile Wizard. Peopletools>Portal>Tile Wizard. Here we are going to create a new tile.
![]()
First step in creating the tile is to name it and give it a title. Name is stored in the database, the title will appear to the end users.

Next up, we select our data type of Navigation Collection. Find the collection name we just created, make it optimized and collapsible. Both of those are options.

It will default the target page name, give it an Owner ID. In this case our Navigation Collection is about requisitions so I gave it an owner of Purchasing. Make it public.

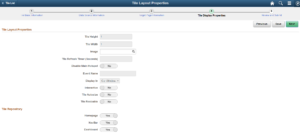
Up next, the display properties. These options default to the choice that is most optimized for Navigation Collections.

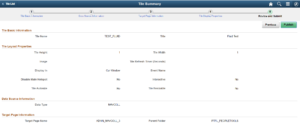
Review and click Publish.

You will now see your Navigation Collection Tile available in the list of tiles.

From the Homepage, select Personalize Homepage.

Select Add Tile.

Select Add Tile and search for the Tile you created.

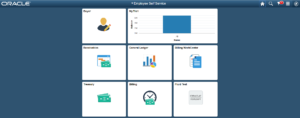
Select it and save it and it will appear on your Homepage when you return to the Homepage.

Click on it, and it will present that configured navigation collection.

If you would like more information on FLUID or FLUID Navigation collections, please email me at larry.zagata@miproconsulting.com.
- Larry Zagata
- Larry Zagata
- Larry Zagata
- Larry Zagata
- Larry Zagata
- Larry Zagata
- Larry Zagata
- Larry Zagata
- Larry Zagata
- Larry Zagata
- Larry Zagata
- Larry Zagata
- Larry Zagata
- Larry Zagata
- Larry Zagata
- Larry Zagata
- Larry Zagata
- Larry Zagata
- Larry Zagata
- Larry Zagata
- Larry Zagata
- Larry Zagata
- Larry Zagata
- Larry Zagata
- Larry Zagata
- Larry Zagata
- Larry Zagata
- Larry Zagata
- Larry Zagata
- Larry Zagata
- Larry Zagata
- Larry Zagata
- Larry Zagata
- Larry Zagata
- Larry Zagata
- Larry Zagata
- Larry Zagata
- Larry Zagata
- Larry Zagata
- Larry Zagata
- Larry Zagata
- Larry Zagata
- Larry Zagata
- Larry Zagata
- Larry Zagata
- Larry Zagata
- Larry Zagata
- Larry Zagata
- Larry Zagata
- Larry Zagata
- Larry Zagata
- Larry Zagata
- Larry Zagata
- Larry Zagata
- Larry Zagata
- Larry Zagata
- Larry Zagata
- Larry Zagata
- Larry Zagata
- Larry Zagata
- Larry Zagata
- Larry Zagata
- Larry Zagata
- Larry Zagata
- Larry Zagata
- Larry Zagata
- Larry Zagata
- Larry Zagata
- Larry Zagata
- Larry Zagata
- Larry Zagata
- Larry Zagata
- Larry Zagata
- Larry Zagata
- Larry Zagata
- Larry Zagata
- Larry Zagata
- Larry Zagata
- Larry Zagata
- Larry Zagata
- Larry Zagata
- Larry Zagata
- Larry Zagata
- Larry Zagata
- Larry Zagata
- Larry Zagata
- Larry Zagata
- Larry Zagata
- Larry Zagata
- Larry Zagata
- Larry Zagata
- Larry Zagata
- Larry Zagata
- Larry Zagata
- Larry Zagata
- Larry Zagata
- Larry Zagata
- Larry Zagata
- Larry Zagata
- Larry Zagata
- Larry Zagata
- Larry Zagata
- Larry Zagata
- Larry Zagata
- Larry Zagata
- Larry Zagata
- Larry Zagata
- Larry Zagata
- Larry Zagata
- Larry Zagata
- Larry Zagata
- Larry Zagata
- Larry Zagata
- Larry Zagata
- Larry Zagata
- Larry Zagata
- Larry Zagata
- Larry Zagata
- Larry Zagata
- Larry Zagata
- Larry Zagata
- Larry Zagata
- Larry Zagata
- Larry Zagata
- Larry Zagata
- Larry Zagata
- Larry Zagata
- Larry Zagata
- Larry Zagata
- Larry Zagata
- Larry Zagata
- Larry Zagata
- Larry Zagata
- Larry Zagata
- Larry Zagata
- Larry Zagata
- Larry Zagata
- Larry Zagata
- Larry Zagata
- Larry Zagata
- Larry Zagata
- Larry Zagata
- Larry Zagata
- Larry Zagata
- Larry Zagata
- Larry Zagata
- Larry Zagata
- Larry Zagata
- Larry Zagata
- Larry Zagata
- Larry Zagata
- Larry Zagata
- Larry Zagata
- Larry Zagata
- Larry Zagata
- Larry Zagata
- Larry Zagata
- Larry Zagata
- Larry Zagata
- Larry Zagata
- Larry Zagata
- Larry Zagata
- Larry Zagata


